Monday, December 30, 2013

Senior Year Ornament

Every child loves to think, wow as soon as I make it to senior year I am on top of the world, I am the big dogs at school, I am almost done.  I won't lie I have thought some of the same things.  So as I put my order in I got my decorative tassel.  Well I don't have a car so what am I to do with it, well how about a holiday ornament.  It keeps it from being around the rear-view mirror fading and out of harms way in bedrooms or a box.  This was definitely an easy project, that is once I found something with a large enough opening to fit the numbers through, and with the bottle it still was not very easy.  A bit of elbow grease was still needed!

Well I hope everyone had a great Holiday season and I wish everyone a Happy New Year!!
Love, Bekkah <3

Homemade Laundry Soap

 In my house money is tight, just like many other homes.  So we do anything we can to save money here or there.  As I was scrolling through Pinterest I saw a recipe for homemade laundry soap.  I figured it wouldn't hurt to give it a try so when we went grocery shopping we got the ingredients and came home to try it.

Items needed:

  • Borax: 3 tablespoons
  • Washing Soda: 3 tablespoons
  • Dish soap: 2 tablespoons
  • hot water: 6 cups
  • old laundry detergent bottles (mine were 150 oz)
Step one:
     Start by getting all your items together.
Step two:
     By using a funnel it makes the whole process a lot quicker.  Start by putting your borax, washing soda, and dish soap in the laundry detergent bottle.  Then once you have your hot water (we just boiled it, but it doesn't have to be that hot) put the six cups into the bottle.  Give it a gentle shake, enough to dissolve the powder.  

Step three:
     Just keep going!  I started mixing batch after batch in a second bottle and added it to the first one.  Within 25 minutes I had almost two entire 150 oz bottles full. 

The Breakdown:
Box of Borax: $3.48
Box of Washing Soda: $3.69
Dish Soap: $1.97
*For the two bottles I filled I only used about a fourth of the ingredients*

Store bought laundry detergent 150 oz: $10-$13
Mischa even likes getting in on the action of crafting on warm sunny days!

Let me know what you think of the recipe!  It smells really good too!
Love, Bekkah <3

Bow Day Wednesday

It seems as though throughout the school year people come up with more and more excuses to not dress up and most of the school is full of students wearing sweats.  Well for me, I don't like wearing "frumpy" outfits.  A way for me to avoid that is by making up random dress-up days.  Everyone has heard of Tye-Dye Tuesday or Formal Friday; well I came up with my own. It started out with Scarf Day Tuesday, where a bunch of my friends and I all wore scarves on a random Tuesday and the idea stuck.  So then I began pushing for Bow Day Wednesday.  To help with the problem of wearing the same bow every week for Bow Day, I got crafty and started making my own and this is how I did it!

Items needed:

  • 9x6 inch fabric
  • 2 inch wide fabric
  • hot glue
  • needle and thread (optional)
  • iron (optional)

Step one:
      Start by ironing your fabric to remove any wrinkles that might make the edges uneven (even though I'm not big on making sure my edges are straight since they will be folded).
Step two:
      You want to fold one side of the material towards the middle-do this horizontally (hotdog).  Then do the same thing to the other side but overlapping the first side.

Step three:
      The next thing you want to do is fold the sides in starting with one and overlapping the second one.  This is the (hamburger) direction.

Step four:
      Now on the first flap you want to fold the corners in just like wrapping the sides of a present.  You do this to both flaps.

Step five:
      Up until this point you were just making the lines, now you can actually glue the edges down and together.  

 ^^^The back after gluing^^^
^^^The front after gluing^^^
Step six:
     Now you get too choose the dimples/lines on your bow.  You can do two or three, it just depends on how you pull the edges together.  Once you have them decided, glue them together... this gets somewhat difficult if your material is thick.  This is where you could use the needle and thread, to make the dimples more secure you could put a couple of stitches in.
Step seven:
     Take the smaller piece of fabric and fold it just like in step two.  Put the flat part on the front of the bow and glue the edges on the back.  If you made the strip long enough you can flip the end of the strip over itself to make a slot for a hair clip or bobby pin.


Finished Products:


I would love to see your new bows, so let me know what you think!  
Love, Bekkah <3

Sunday, May 5, 2013

Mom's Request

So as I was deciding on my next canvas project my mom approached me and asked if I would make her one. Turns out she had already picked one out off Pinterest. So I went to work making it. The pictures are pretty self explanatory on the steps.


Sunday, April 28, 2013

Pinterest Find!

So as I was doing my nightly check of Pinterest crafts I came across a pin of 7 simple ways to help in the craft room. Since my craft room could always use tweaking here and there, like whose doesn't?! So I was looking through the suggestions and I found them really good! I am sharing the URL and hope you can get some inspiration from this site as well! Always feel free to share you ideas with me as well! http://www.everythingetsy.com/2013/04/7-simple-diy-projects-for-your-craft-room/

Saturday, April 13, 2013

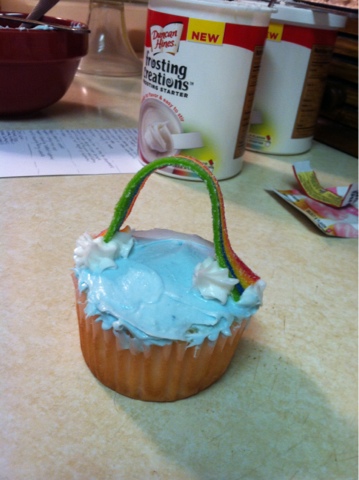
Cupcake Crazy!

So I have recently begun taking a speech class. When I started let's just say I was less than happy to be taking it. Now four weeks in and I'm loving it. Today I had my first major 5 minute speech, the demonstration speech. I got to pick any topic to speak about while demonstrating, so why not do something I enjoy, I asked myself. So I did. I decorated cupcakes for a phenomenal grade on my speech! Lets just say though after decorating 24 cupcakes for my birthday for yearbook three weeks earlier and then another 24 cupcakes for my homeroom, 24 cupcakes for easter, and the 40 for my speech class I can officially say I am cupcaked out! So here are a few of the designs I used for my speech! These are not the only designs I did but they are the only pictures that came out well.


A Special Canvas

So with my love of painting quotes on canvases I also have the love of reading. I take very good care of my books just so everyone knows. Well, for this canvas I needed something to make it be unique so I used book pages. Keep in mind that the pages I took were from pages of a book my mom had that had no cover and was missing pages already. To get this one to turn out perfect the way I wanted it to, I made the saying and photo on a word document and then printed it out to trace. I am pretty sure this is one of my most favorite pieces of art I have made!


Canvas Crazy

So if you actually do follow me on Pinterest you would know that I have a love for painting canvases an a love for quotes. So today I thought I would share some of my favorite with you! With these canvases I tend to pick out colors and a quote and just get to work. I honestly wouldn't be to surprised to see my mom go bankrupt because I buy so many canvases. Ha!


Thursday, January 3, 2013

A Seat of Inspiration

Hey everyone!  So I have been waiting until I had a bit of time to post this one.   This was one of my favorite projects I have done.  For my mom's classroom I decided it needed more color and some little kid touches. There are not really any steps for this one.  It's just a paint your heart out kind of project.
So this was the end of all colors and then we decided to add "Ready Set Learn"  That was placed on the seat after these pictures were taken.

This was my variety of colors that were used :)

This was the original condition of the chair. I thought to take this picture after I painted the seat but as you can see, not the prettiest looking chair.  That's okay though, I only spend $1.00 on it at a garage sell. I would have to say that is a pretty good deal!

So there you go!  Now my mom's class is a little brighter! :D  I hope you enjoyed!
<3 Bekkah

Scarf Organizer

Well I would like to start to see how everyone's Holiday break has been.  My went pretty well.  I received many new things and tons more inspiration!  Like this post I got this idea from Pinterest.  A friend also informed me that there was something similar at Ikea.  I have a lot of scarves more that probably actually wear but, I couldn't even find most of them before.  So lets take a look at this new idea for organizing your scarves.

Items Needed:
  • plastic hanger
  • a package of full circle shower curtain rings(I got my pack of 12 at Wal-Mart for about $2.00)
  • ribbon
  • paint or as it worked better for me, nail polish and a Q-tip
So it only cost me about $4.00 to do this project.  I had the hanger and nail polish.  I got cheap shower curtain rings and cheap ribbon.

Steps:
  1. To start, I would lay out everything and figure out the patter or way you are going to hook everything together.


2.  This step takes the longest.  Now I just started cutting about 5-6 inch pieces of the ribbon.  Of course if you find that to long you can shorten them.  Start by tying the top five loops to the hanger, one ribbon for each loop on top.  Next, tie each of the top five to each so the first gets tied to the second.  Then the second one gets tied to the third also and so on.  The second row then gets tied to both of the loops above it.  After that tie the second row loops to each other as well.  With the third row you do the exact same thing.

3.  This step is easy.  Start by dipping your Q-tip into your paint or nail polish.  Then just start making polka dots  on your hanger.

And here is my finished project!


So here are the ending products with and without scarves :) 
I hope you all enjoyed this idea because I know I did a lot! 
<3 Bekkah


Wednesday, September 19, 2012

BOO

So of course I got this wonderful idea from Pinterest.  You should follow me!  So I made these for about 6 bucks maybe a bit more with candles.  I started by taking a permanent  marker, I tried sharpie and it didn't work, to write the letters on each cup.  When you write on them make sure the handles are going the same direction.  If you mess up just take a wet rag and wipe it off.  To make sure the writing doesn't go anywhere put the cups into the oven at 150 F for 30 minutes after you write on them.  Once they have cooled you can fill them with candy corn.  At the top you can put a candle.  I set a white candle on top of each.  I think this is super cute and I hope you do as well.  Thanks let me know what you think! :D

~DIY or Bust~
<3 Bekkah

Fall is in the Air!

So my mother received this burlap bean sack from someone that she worked with a few years back.  To put it to use we decided to make a fall decoration.  We set a Styrofoam circle on the bottom.  Then filled around it with beans.  I think that parts funny because it was a bean sack, got empty, and had beans put back in it.  We then stuck the arrangement of (fake) plants into the Styrofoam.  To wrap it up we put a red ribbon tie around the top to keep it all together.  Well I hope you enjoy this and maybe even try it out.  Let me know what you think or how yours turn out!

~DIY or Bust~
<3 Bekkah

Saturday, June 30, 2012

Quotes with Crayons

So I tried out another turn on the crayon art.   I did a piece with a quote and picture.  I liked it because it looks like the girl is dancing in colored rain, but when I showed my sister she told me that it looked like the girl was make from the crayons and I kinda liked that idea better :)

items needed:

  • canvas
  • crayons
  • hair dryer
  • printed picture
  • quote
  • Popsicle stick
  • sharpie
steps:
  1. glue your crayons onto the canvas, then glue your picture onto the canvas
  2. write your quote onto the canvas.  I had started out using a silver sharpie but after I melted the crayons it was really light so I went over it with a black marker.
  3. I taped a popsicle stick over the picture diagonally so it wouldn't completely cover the picture
  4. melt your crayons straight down.  again make sure you tilt the canvas to prevent it from splattering everywhere.  :D
 The canvas with the silver writing... "Life isn't about waiting for the storm to pass... It's about learning to Dance in the rain..."
The before picture....

Let me know if you try this out. :) 

<3

Circle Splash

I thought I would do a spin on the usual straight crayon art.  I decided to try some shapes and this one turned out really well I think.
Items needed:

  • crayons
  • newspaper or trash bag
  • hair dryer
  • canvas
  • hot glue and hot glue gun
steps:
  1. cover your work surface with your newspaper or trash bag.  Being a circle it shoots off in all directions instead of straight down.  Be prepared to scrape wax off of stuff.. I wore an apron doing this because I have learned my lesson by ruining a pair of jeans with crayon wax.
  2. glue you crayons in the shape you want.  Start by laying them out in the pattern you want and then glue so there are no mistakes
  3. begin heating the crayons with the hair dryer.  You will have to twist the canvas to get all the spots.  This does take patience and practice because if you don't heat them with the canvas tilted back it will splatter everywhere.  Hope you enjoy!
 This was my trash bag after the project... you can also see in the bottom right corner I got some on my table as well.....
this was the before picture :D

Let me know how yours turns out in the comments below... Have fun :D